Declaration!
Do not continue reading if you are not familiar with the basic skills of Sevarog. I will not go into any details of basic gameplay. Go read the basic guides out there that does a great job of explaining how his Siphon ability works.
TL;DR-version:
(nah JK, its long - If you dont read, you dont learn)
The idea of this advanced Sevarog guide/build is to give you options in a match. Options comes with the loss of a few card bonus upgrades. The majority of the main card options for Sevarog is already without card upgrade bonuses so the difference is not that much. There is no such thing as a "best build" or "perfect card setup". Every game is different, and so should your card options be.
Your succes ratio will strongly depend on your analysis of your opponents current advantages and early/mid-game choices. I dont define succes ratio as a win/loss ratio. Paragon is a 5-man team game, and you should not define the quality of your build by a win/loss ratio, or kill/death ratio. Sometimes your job is to die, sometimes your job is to leave a possible kill to a teammate in order to force other enemies to stay out of travel mode to land another kill for you or your teammates.
If you happen to fulfill your role to the best of the current situation you just died in, escaped from or obliterated your enemies in - your build is working.
The role of Sevarog
Sevarog is a tank. He is not a fighter. Your job is to stay on the fontline of every fight, catch the enemy in making mistakes and be in the face of everyone who thinks he is tough enough to take on you and your four best new pals.
My philosophy in my build is to balance out two very real problems you can face as Sevarog.
- You will be taking a heavy beating.
- You need to be dashing out a heavy beating.
In one end I see a lot of Sevarogs build a fighter deck with attack speed. This usually results in lacking the tanking aspect and resulting in a premature death, following "GOOD JOB!" announcements from your no-longer-best-four-pals.
In the other end, I also see Sevarogs going all out tank, leading to the worst problem in the game: You can be ignored. With your ultimate on cooldown the only thing you then bring to the table in a teamfight is a somewhat decent immobilize.
Neither of the two extremes makes you the popular kid on the block and both extremes must be in the back of your head all game long.
Let me just make quick mention of a few cards before we go into the build idea itself.
Cards of note
Madspore Sash -  Minor Guard +
  Greater Guard +
  Greater Guard
This is my bread and butter. Not only does it provide me with the best stat in the current meta - it also makes jungling feeling like a breeze and completely makes Iggy obsolete with its turret removal (bonus info: It also hurts wards you cant reach)
Keep in mind, that the AOE counts as an attack on an enemy hero. Meaning you will be focused by towers if you let it hit an enemy.
Notice it doesn't have a upgrade bonus. This means you can just upgrade it whenever you feel like you lack some armor. Dont just upgrade the card blindly if your current situation calls for other stats, like health, energy armor or damage. I usually find myself NOT upgrading this card until I've gotten an upgrade bonus from something else.
Stonetooth Heart -  Health +
  Greater Health +
  Greater Health
This card has a very nice fully upgrade bonus, and provides me with the obligatory physical penetration.
Example of build
A small example of a build is shown here for educational reasons. I go through the whole card deck later down.
A usual jungle day starts for me with a standard opener of,
 Guard Token +
  Jungle Drink +
  Health Potion
This setup helps me get the early three camps, and protects me against offensive junglers - which is more and more common these days. As soon as I hit the 6 point mark I look for a gank or quickly head back and discard the potions and the guard token and go for
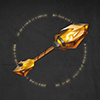 Harvester's Key + Madspore Sash - with upgrade options mentioned above, (1 guard + 2x 3 guard)
The harvester key helps you get that level 5 very quickly, and can quickly be discarded after placing the 2nd harvester, and turned into a single minor guard upgrade in the madspore sash.
You should pretty quickly buy a
Guardian's Key or a Lord's Key - with the upgrade options  Greater Health +
  Greater Health +
  Greater Health
But - REMEMBER - Do not just blindly upgrade your key. You will not need three consecutive greater health upgrades. I know the guardians key got a small upgrade bonus in damage - but dont be baited by that.
I very quickly throw in a
 Spiked Boneplate -
  Minor Guard +
  Strike +
  Major Strike
And I usually rush to upgrade it fully because of the early game damage.
A  Greater Health in my key usually ends up being my next buy, since it increases my overall survivability vs energy and physical dmg.
The next upgrade is where it gets tricky. Do I get a energy armor or do I upgrade my health or physical armor? This depends on the matchup im meeting. If im unsure, I go for a health upgrade. I can always throw in a major guard in my Madspore Sash if needed.
This is one opener. Another one will be explained below where one of my full card deck is shown.
Complete card deck
With this in mind, here is my total card build.
Early game, I got a wide variety of single cards. I often open with these three
 Guard Token +
  Health Potion +
  Jungle Drink
I keep these to upgrade if I feel like I need a really fast harvester - often I just switch out the jungle drink for that extra strike token.
 Harvester's Key +
  Health Token +
  Strike Token +
  Strike Token
If I skip this, I go straight to (not upgrading it, but swapping out the guard token for the minor guard upgrade to save room.)
Madspore Sash +  Beta Guard +
  Beta Guard +
  Minor Guard
Then I usually get my harvester (but not upgrading it)
Lord's Key +  Greater Health +
  Greater Health +
  Greater Health
I dont need to upgrade any of this right of the bat since there are no upgrade bonuses, I can just throw in a guard or a health upgrade whenever I feel like it.
Now depending on the sitaution, I go for my ward  Guardian's Ward +
  Minor Strike +
  Health +
  Greater Health
or my
 Spiked Boneplate +
  Guard +
  Guard +
  Guard
Guard
I keep a tempered plate in my build, but it rarely gets played tbh - because of the guard in the madspore sash and from the spiked boneplate. I am currently waiting for a better card to swap it out with. Currently missing some funny active cards on the Sevarog Deck.
 Tempered Plate +
  Lesser Health +
  Guard +
  Greater Guard
By now I usually lack some energy armor, and I throw in a
 Tuned Barrier + Beta Barrier + Beta Barrier +
  Greater Health
My go-to item then comes into play,
Stonetooth Heart +  Greater Health +
  Greater Health + Pierce
Now, I know I lack a little pierce here. I make up for this, with the only half-viable active I can get myself to use on my Sevarog, because c'mon - beyond swinging the hammer, throwing in a few spells, Sevarog isn't really the biggest fast-clicking-hero in the rooster. So I play
Splinterbark Vest +  Greater Barrier +
  Greater Barrier +
  Greater Health
This is not my favorite card, because of the lacking attack speed - but it gets the job somewhat done, and help my teammates out a bit. This is one of the to-be-swapped-out cards when Epic gives me something better.
Thats my current build. I got another deck focusing harder on physical armor, because I meet a lot of heavy physical teams - but all around, this is my go-to build.
How to play death for dummies:
(more videos will be added once I capture good explaining ones)
The opener
So here's the rundown on what you need to do, to make that big difference in teamfights. The first rule of Sevarog, is that he has amazing reach potentiel. Yeah sure Riktor can hook the enemy into melee range, but this is nothing compared to a perfect Sevarog setup where the enemy team gets caught in your Subjugate , you swoop in with your Phantom Rush , and follows up with the good ol' Colossal Blow . This is basic stuff. How to set it up, is more of a challenge. And to this, only your imagination sets the limits.
Your job is to make this combo work, as soon as the enemy is making a mistake. BE READY for it. There is no such thing as perfect plays. The best players take chances that, if reacted upon, will cost them. Keep in mind, the reach of your Subjugate is very long.
One very easy example of this, is a melee defending creeps (See video below in a sec). With the Black Buff in the game, you cannot let creeps into tower range. A ranged player will take the chance to follow the creeps and hit the tower once to apply the debuff. Do this a few times, and the tower is gone.
Players know this, and react to it by defending offensive. This is your chance. A quick example of this, is how we push a two-man defended tower (the rest of the enemy group is coming). Notice in the video how I dont show myself in order to give them a feeling that its safe to defend offensive, while I go in with the creepwave that I know they will try to destroy. Would I have shown myself, they would maybe have defended defensively.
Dont be afraid to move into tower range to make that sweet Colossal Blow. Beware of enemies like Grux or Riktor who can pull you further into tower range tough.
(Yeah I die from that fucking Murdock ulti you just see a glimps of in the end. Fucking Gideon didn't counterward, "GOOD JOB!" etc.) (His ulti followup on my colossal blow was perfect though)
The wall
Next lesson is very basic, but so needs to be repeated because I see tank after tank, not abusing his potentiel of blocking enemy ranged from shooting low-life friendly players. This isn't DOTA, LOL or HON. You can block players ranged attack. This actually goes out to every role. Block an enemy ranged attack, save a player.
A simple example here, is were my team is pushing a 2nd tower where the enemy team havn't gotten into place to defend it. Their were outnumbered in defending it, and they retreat. We destroy it fast, and on their retreat to the inhibitor, we fight, we kill etc. But notice around 00:15 where my good friend Khaimera, is pulling back from the enemy inhibitor with no hp, and Gadget is going tunnelvision on him. She know I've just used my Colossal Blow and Subjugate, so she's in no risk of being thrown out in the lane by me. I am no threat beyond my autoattack and Siphon. I can understad why she would want to try to land a kill. Notice how I block her while Khaimera behind me is going "YEAH WHO'S THOUGH NOW? YOU LITTLE WANNABE-MECHANIC B*TCH!"
Gadget is even jumping to try to land that sweet killing blow just beyond my shoulders.
This is what I mean by being in the face of the enemy. Even in a situation were noone needs saving - taking a few hits for a squishy no-escape player like Khaimera, can be the difference later in the fight for him landing a kill or needing to retreat.
When to use your ulti
This is NOT a nobrainer. The biggest issue when im playing, is the constant question in my head - Do I ulti now? Or do I save it? If there is a chance to make an opener with Subjugate, its pretty obvious to ulti.
Yes your ulti does a lot of damage, but so do a few hits from Murdock. Do NOT use your ulti with the mindset of dealing damage. I would swap the damage from Colossal Blow with a 20 second cooldown any day. Your ulti is a displacement tool with a sidebonus of packing a punch.
The real dilemma presents itself when a teamfight is not being initiated the way you expected, or that the enemy team is initiating. You job on every initiation (that isn't done by you) is to quickly evaluate the outcome of the teamfight, and react with your ulti accordingly.
From this, a few indicating factors can be pointed out:
- If there is ledge where an enemy can be pushed down to, and then turning that 5v5 into a 5v4 - you should ulti.
- Is your key carry being swarming by the enemy melee - you should ulti
- Can you displace an enemy melee player that has his gap-closer on coolown, i.e. , ,
 or
or  - you should maybe ulti
 - Is rampage using his ulti to take the attention of your whole team - you should maybe ulti
- Are you nuking down rampage while his ulti is up, and is he standing next to a wall, so you wont knock him away from your group - you should ulti
- Are you pushing creep waves and is it a tight push before the enemy rushes in to defend, - you could clear a creep wave with your ulti if you are sure it would land a tower or inhibitor kill.
- And of course, if you can push an attacking enemy into your tower range, and follow up with your subjugate to lack him in tower range, you SHOULD ulti.
These are some pointers for those upcoming Sevarog players out there, that understand the basics and need take on the role of the more defining Sevarog player.
FAQ
Frequent questions that may appear while playing this build and your answers
-
Q: "OMG according to [insert article], your card setup is fucked up."
A: - "I dont do theory crafting - I apply it. My build has changed a lot over time, and it changes every time I feel I lack a stat, or an option. Notice how none of my armor cards has full on armor. I always want the option of throwing in a health upgrade if I need one. I bulk it out with having non-upgrade cards with armor upgrades that I can make up for the lacking armor elsewhere (if lacking) such as the madspore sash." -
Q: "You dont do enough damage."
A: - "I'm a tank. I do plenty. And with my four amazing teammates, my TEAM do more damage with me enabling them, rather than me shining with a Windcarrver Blade like another Rampage wannabe."
If you really feel like you need some damage, swap out the Tempered Plate with a Thunder Cleaver. The attack speed bonus is a decent damage increase paired with the better farming and pushing capabilities. And again, its another - no upgrade bonus card - so you can throw in 3 major kinetic upgrades, and just throw in an upgrade whenever you feel like you lack some damage. (I dont know if the activate on this applies the Splinterbark Vest debuff - any input on this would be helpful and creditet!)
Another great choice could be the Thorned Greenweave.
Again its a balance. If you feel like you are being ignored - just add some damage. Its on the expense of survivability. And its not only cards that does it. Your playstyle is big in the determination of who the enemy will focus. I'll try to add a few videos on psychological aggro on the enemy team. -
Q: "In video X, you are playing against newbs."
A: - "Okay." -
Q: "How many FAQ-questions does a guide need to look like its interesting from made-up questions by the author itself?"
A: - "Well, I dont know - I'll add some of the questions in the comment section with creditation if any good questinos comes up that deserves the attention of the rest of the class." -
Q: "Do you ever spam "Good job!" when a teammate dies?
A: - "All the fucking time man. I'm a PS4-player with no other hobby in my life than playing Sevarog. Spamming that shit is the only relief I get in my life. Nah JK - dont be a prick" Not kidding about the hobby though.. (sadface)

@ThorSuhr, Nice one! I'll get back with comments ober the weekend when I complete reading it
@George thanks! Looking forward to reading your feedback :)
@ThorSuhr, I've seen people build Sevarog to be completely useless (non-tanky), but this build and guide works absolutely perfect. It's fun and it works!
Love this build! gave some interesting insights even for my own tank build. My current build has some very similar core cards like Madspore and Stonetooth, but I notice your hp count is way higher hitting a bit over 5000, mine reaches 4100 after 80 stacks. Is the extra 900 hp worth giving up certain utilities like Stab Link? or Drink the Spirits? How would CDR fair on him? Sorry to bombard you with more than one question lol
@SuSpence26
Thanks a lot for the comment!
I'm actually currently testing out boosting damage with putting Swiftcreek Heart in the build, making him a bit more brawler, and less tanky but maintaining a good health upgrade bonus.
Drink the Spirits was in my deck before Splinterbark Vest was added. My current conclusion on that discussion is that its all about setup and matchup. If I'm facing a physical armor heavy setup, Splinterbark Vest is the way to go. Drink the Spirits really shines when sneaking around in the jungle and keeping the HP up while waiting for a chance to gank.
On the Stab Link, I feel the health regen is a bad stat. I would much rather use a standard Blink Charm which I've seen a few try out.
The problem with using Blink Charm is the lack of stats. I feel like whenever I could spare 5 card points into a Blink Charm, I would usually be better off with some more damage (assuming im tanky enough for the current meta ingame). And overall I feel like the teleportation is something that shouldn't be necessary on a hero like Sevarog with Subjegate and Phantom Rush to position yourself.
If I need a Blink Charm to position myself, I am doing something wrong. But this is just my initial thoughts - I haven't tested it out yet, and felt if makes a big difference, so the verdict is out on that one until I get a chance to test it.
So far I am waiting for the introduction of the new map Monolith, and the removal of travel mode. By then, the value of Blink Charm will increase I suspect.
@SuSpence26, dont know if I tagged you right in the other message :)