


*This guide was written with the PS4 in mind*
_______________________________________________________________________________________________________
Overview
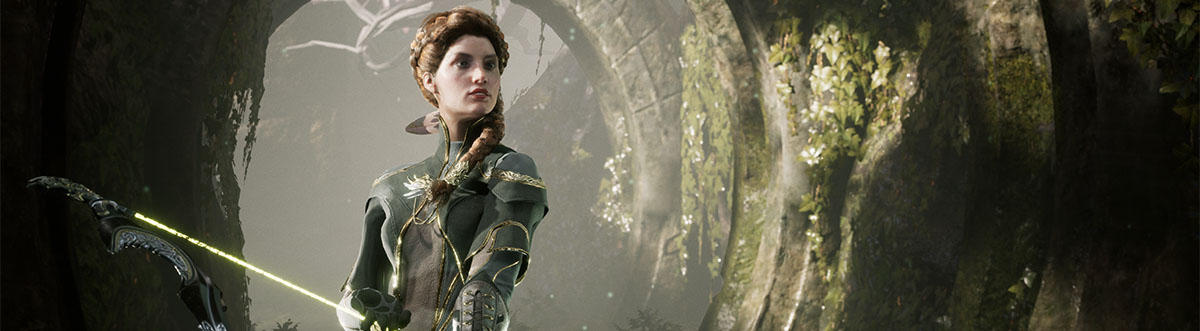
Sparrow is your basic long ranged carry, meant to clear lanes and provide support. The lack of an escape move means you'll be getting rushed a lot, but we'll turn Sparrow into a critical strike machine capable of standing her ground. This guide is a gameplay strategy for building a critical hit/bonus Sparrow. You will be sacrificing attack speed for damage. We design this deck to make hits count. Trust your build, by late game you will do more damage in one hit than you could have if you had gone with an attack speed build.
*Jungling and Harvesting won't be discussed*
_____________________________________________________________
Starting Game
Pushing middle early on will put you into bad situations where enemies can sneak up behind you from both left and right sides of the map. Middle lane is a death trap for the low health Sparrow. This is also why you must always keep an eye on jungle paths, you don't want an enemy to sneak up on you from a shadow pool.

*As you can see from the map, you don't want to cross the [red line]. You want to stay at about the [yellow line]. The yellow line should be at about the stairs that lead up to the middle in each lane. The only time you cross over to the [red line] is when you have other heroes with you. Even then you want to let them go ahead while you stake out at the [red line]*
Sparrow is a support character (not a tank) so I recommend choosing either the right or left lanes, avoiding the middle, this will leave you to farm minions in relative peace. Ideally you want to follow another hero into one of these lanes but Sparrow is perfectly capable of maintaining a lane all on her own. You will be maintaining a lane, i.e. holding the enemy at bay, not pushing the lane.
The key to **maintaining** a lane is to stay close to your tower. Don't be afraid to retreat to the safety of your tower if enemy heroes start pressing forward. They will be hesitant to attack you if you are under your tower, so you camp the tower and let their minions walk straight to you. *FARM FARM FARM*
If you want to volley the enemy (to push them back) make sure you are at maximum range. What I mean by this is if you take one more step backwards they will be out of range for you. This is your safety net, with this adequate spacing you can easily retreat if needed. You should also be using your Hail of Arrows to keep the distance between you and your enemy. Your attack is relatively weak right now so don't feel like you're wasting it if you only use it for this purpose.
Where most people go wrong is they push forward too fast with Sparrow, leaving her exposed. If you're running with a 3 man crew then it's fine to push forward but always stay behind another hero.
As you're maintaining your lane, try to stay directly behind your minions. Enemies will try to push you but if you keep circling around your minions the enemy's shots will hopefully hit the minions instead of you. Minions = Meat Shield.
_______________________________________________________________________________________________________
Transitioning to Mid Game
I make it a point not to teleport back to base until I have at least 9 points to spend. That's 9 points built up after the 3 you start off with. Personally I stay until I have 12 points, that way I won't have to sell my health/harvester/mana potions.
**9 points bare minimum**
*The reason you want to do this is because whenever a hero or enemy leaves a lane, the lane gets pushed. If you're constantly leaving your lane when you acquire 3 points then your towers are going to get destroyed. Usually I request back up in my lane and let them defend while I teleport back. You never want to leave your lane unoccupied unless you are holding on for dear life*
Mid Game Cards
The 2 cards you're going to aim for are the following:
-Blade Of Agora with the following upgrades:
*Major Strike
*Major Strike
*Major Strike
Once fully upgrade you're going to have a 200% critical bonus (total) with some strong physical damage. This will help you farm minions even faster, leading up to your next purchase:
-Brightsteel Plate
*Zealous Wound
*Zealous Wound
*Righteous Wound
So now we're sitting at a 39% chance of critical strikes, with a 200% bonus if we do, not to mention the high damage you're dealing out. Go back out to the field and start pushing lanes, you'll deal out enough damage to push back enemies provided you're able to land your shots. Don't get too cocky though you can still get snuck up on.
Group up with your teammates, or your Jungler, as they rush enemies. If you have a good shot on enemies take it, otherwise stay behind them and clear minions in the lane as your teammates push the enemy. You'll be able to farm much faster now with your Crit. chance/damage. Remember the 9 points rule.
If you follow the rule then you'll be able to buy all of this immediately:
-Spear of the Rifthunter
*Wound
*Wound
*Strike
The beauty of this is that it's cheap to buy AND adds a real punch. You just added 18% Crit Chance and 30.3 points of damage for a total build of 47% Crit Chance and 106.1 damage. Damage sounds low but you're going to be hitting criticals for that 200% bonus.
_______________________________________________________________________________________________________
Late Game Cards
We're adding more damage first:
-Adamant Edge
*Major Strike
*Major Strike
*Strike
Then we'll go for the overkill:
-Spear of the Rifthunter
*Wound
*Major Strike
*Strike
By Late Game you should continue clearing lanes for your allies. Don't stick around in a lane too long, just clear the path for minions so they and allies can reach the towers. You want your allies to push a side, they are your distraction. As they push a side, you will be as far away as possible pushing also. You will be dealing out so much damage that minions should be 1 shots, 2 at most. This will push you incredibly fast towards their core, as you will be able to take out inhibitors all on your own.
For the last card, I recommend:
-Bounty Stalker
I don't add any upgrades to it because:
1. It's not necessary (you gain the bonus the moment you purchase the card)
2. You're all out of points
This card is what skyrockets your Crit. Chance.
________________________________________________________________________________________________________
If you don't have this card then I recommend something that will increase your attack speed.
Swiftcreek Heart
or
Windcarver Blade
Either one is a good choice, just remember you won't have any points to upgrade them.
________________________________________________________________________________________________________
Once you manage to get your last card down it's game over. It's critical after critical after critical. By this point in the game your team should be pushing the enemy core, at which you will be mowing down the enemies as they try to defend their core.
@LtGoose, I thought that building max DPS is done without crit. At least after that patch where crit bonus was reduced from 250% to 200%. Did you do math calculations you could share?