
Cheat Sheet
Deck One: Glass Cannon
The Archmagus
Health Potion
Mana Potion
Mana Potion OR Scout's Ward
Meltdown (Cast, Cast, Cast) [9]
Lord's Ward (Mana, Mana, Chrono) [9]
Tainted Magick (Cast, Cast, Cast) [10]
Wellspring Staff (Cast, Cast, Major Cast) [10]
Pendulum of Lords (Chrono, Chrono, Advanced Chrono) [10]
Shadow Scroll (Major Shock, Major Cast, Major Cast) [12]
Deck Two: Defensive Support
The Archmagus
Health Potion
Mana Potion
Mana Potion
Lord's Ward (Upgrade last, Advanced Chrono, Advanced Chrono, Advanced Chrono) [12]
Circlet Of Health (Mana, Mana, Mana) [9]
Burnblood Powder (Cast, Cast, Chrono) [9]
Power Chord (Cast, Cast, Major Cast) [10]
Tempered Plate (Guard, Guard, Greater Health)* [10]
Tuned Barrier (Barrier, Barrier, Greater Health)* [10]
*Take most relevant first.
Yo,
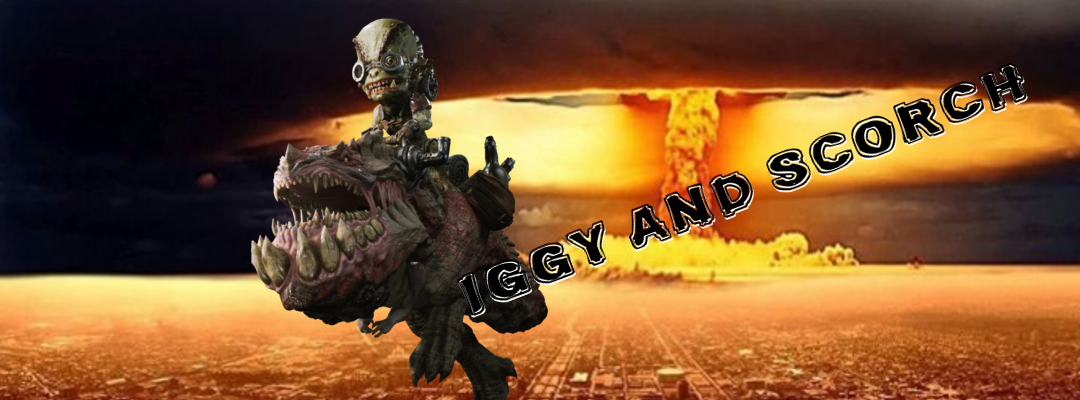
This is my second guide that I've felt compelled to write for my new muse, Iggy & Scorch, referred to herein as I&S for simplicity. So, you've seen him running around and you've made your opinion on him, whether that be good or bad (mostly bad) it all comes down to the players you've seen using him and how effectively they've been playing him. Why do most people think I&S is a bad hero? Simple, they're playing them like Murdock or Sparrow and it's not working because playing I&S isn't about face rolling, it's about positioning and prior planning, which feeds into our overall goal - zoning.
Summary (TLDR)
So, the low-down on I&S to summarise for you in as few as words possible...
You're not the carry, you're not the ganker, you're not the fighter.
This, however, does not mean to say you cannot get kills but you shouldn't be looking for them, your role is to support your team by providing mobile platforms to fight from and cutting off escape routes to secure fleeing enemies, you control the flow of battle and manipulate your enemies into favourable positions for your team. I&S is without a doubt the current tactician of Paragon, the one and only hero who can reliably put your team where they need to be whilst holding off your enemies and I'll tell you how you can do that shortly. My game experience may be somewhat limited due to work and family commitments but I play soloQ exclusively and have managed to work my way up to gold rating on Agora.gg and am slowly progressing towards platinum, whether this makes me qualified or not, I can't say but I do know a thing or two.
Pro's
- Amazing ability synergy
- Great at control
- Hard to catch
- FIRE!
- Powerful backline mage
Con's
- Weak before level 5
- Requires map awareness
- Doesn't play like other hero's
- High learning curve
Abilities Overview
Ignite [Passive]
Alright, our passive which has a minor effect that's somewhat useful. If an enemy runs through either our or they have one stack of oil applied to them, when we then hit them with a , or they take additional damage whether they're in oil or not, as the stacks are applied to THEM. Although this isn't the best passive in the world and adding to the fact that it's hard to use properly, it's still a nice little damage boost, but it is important to remember to ignite any oil on the enemy before you apply more oil, likewise if they walk out of oil and back into oil they'll receive another stack. It's early days for stacking passives and there's hardly any real information on how they actually work, so I have to assume it's one stack at the moment because there's nothing to state otherwise.
Use this in conjunction with your oil abilities to do more auto attack damage.
Molotov [LMB  ]
]
Auto attacks, how interesting! Well there are a few things you need to know about , it has an arc at the moment and aiming at a distant enemy whilst the indicator is red will NOT mean the ability hits. Gravity does take effect in Paragon so you'll need to learn the trajectory of your so that you can consistently hit your target. The damage scaling is pretty good on Molotov and it's far from useless as an auto attack but it is significantly harder to hit someone with due to that pesky arc they decided to add. Use your Molotov's to ignite your oil abilities and trigger your passive damage on enemies.
Aim about an inch above your targets head to hit at max range, when practised you can use the arc to your advatange to attack over obstacles.
Oil Slick [RMB  ]
]
A fairly basic speed increase that also makes you spew oil behind you in a nice trail that can be ignited and applies oil to enemies, this is probably the hardest ability to get full effect out of so I use it primarily as an escape tool and only ignite as a last ditch resort because activating travel mode is usually the better option. This can also be used to help you kite enemy heroes aroung your turrets to limit the damage you take whilst maximising the damage they take, forcing them to take your passive damage boost on top of the Flame Turret Damage.
Try throwing down a turret as you retreat to both damage your enemy and ignite your oil slick. The fire pool that's left behind by Molotov will also ignite an Oil Spill as it lands.
Flame Turret [Q  ]
]
This is I&S's identity, throwing down our turrets (up to three once ranked up) and controlling the battlefield. Our turrets are what gives us our amazing versatility and ability synergy and where all of the planning comes into the game. I will detail a section on how to use turrets because they're so important and diverse that it requires a lot of explanation and strategy. Turrets have a short activation period but can be thrown some distance, they last for around a minute and can be destroyed with 3 auto-attacks or AoE's that tick multiple times (, etc.)
Positioning is key, think about where you're placing turrets and how you can utilise them.
Oil Spill [E  ]
]
One of our two bread and butter abilities, you throw a nice puddle of oil on the floor that persists for a fair while, so you don't have to immediately ignite it. Igniting the oil will deal the damage stated on the ability to everything caught in its area of effect. This is best used pre-emptively as it doesn't have enough range to land in front of fleeing enemies (partly why we can't chase) but if you can set it up before hand it's an amazing ability. This can be ignited with , and . This ability also applies 1 stack of oil when it's passed through.
For instant damage you can use this directly after throwing a turret or after throwing a molotov (leaves a glowing patch on the floor)
Flame Belch [R  ]
]
This is our ultimate ability which has multiple uses. A quick glance would show you that Flame Belch does a lot of a damage and a knockback once the full duration has been reached, however, you can activate your knockback early for emergency situations (this will end the ultimate early) by re-activating the ultimate and you can also use Molotov and Flame Turret whilst your ultimate is channeling. Try to hold off on using this ability until you either need to escape or can secure the kill, the reason being is that the knockback can actually help an enemy escape if not used carefully, though it can be avoided by turning away before the knockback triggers.
Use Flame Belch from behind the enemy team to force them further into your frontline and deal heavy damage.
Abilities upgrade priority
Pretty straight forward here.
Reasoning for being over in priority is simply because our escape isn't that great and its combat uses are limited so there's more DPS gain from ranking up .
Ability Combos
We don't have combo's so much as synergies but there are a few "power" combo's that we can use.
> - If we throw down a flame turret enemy players, especially melee aren't so worried about stand in its area of effect, however if we throw an Oil Spill into the turret's range it'll be instantly ignited causing high burst damage that can really surprise enemies.
> - This is how we contribute in team fights after the battle has started and we've set up (detailed later) throw down an Oil Spill on the majority of enemy players and then Flame Belch them, this causing massive AoE damage and burst that can easily cripple the entire team if timed correctly.
> - This combo is used to deal with melee agressors, simply run around your turrets and activate Oil Slick, this will force them to take damage from your passive as well as your turrets whilst also allowing you to avoid a few hits.
> > > > - This is our all in damage combo, it has a ridiculous damage potential in theory, though there are a lot of deciding factors, try and turn away from your target before Flame Belch expires so that you don't knock them out of your turret range.
Early Game
Pre level 5 we need to be very careful and very aware of our surroundings, we have one turret (2 at level 4) and not enough mana to sustain them for as long as we'd ideally like. At this point, we're the most susceptible to ganks and are easy pickings for those looking for kills. With good map awareness, we should be able to avoid all but the most threatening of situations with relative ease, using our turrets without our tower's range to hold of minion waves.
It's vital that we do not push to the enemy tower at this point, focus on using your turret primarily for your defense and zoning the enemy laner to deny last hits, and just use your auto-attacks to last hit, letting the minions do all the work. This is certainly harder to do but if we push all the way to the enemy tower we're up shit creek without a paddle and we're going to die.
Farming is essential early game and is extremely easy once we have level 2 turrets, minions literally melt and you'll be getting last hits for free essentially, if a team fight does break out in mid lane or there is a 5 man push then go and support your team, I&S's wave clear and capability to hold off multiple enemies is unrivaled.
Devote all of your time to farming as many minions possible, this will contribute to your powerspike in the mid game.
After you've got your Flame Turret to level 2 and at least one rank of Oil Spill you can easily solo red & blue buff so don't hesitate to go and grab those from your jungle if your jungler is neglecting them, or if the enemy team is preoccupied take theirs, placing 2 turrets and oil spill will kill them almost instantly. Try and steer fights into the jungle where your turrets are the most effective, forcing enemies through bottle necks is extremely effective.
Mid Game
Mid game is where we really shine, this is where our power spikes and we're a serious force to be reckoned with, if enemies try and force their way through our defenses they'll be punished heavily forcing them to either focus on turrets or brave the damage. Using our Oil Spill and Flame Belch in combination with our Flame Turrets will essentially mean that enemies will have to avoid your defenses if they want any chance at winning an engagement, now is a good to start taking towers with your team. Our kit doesn't allow us to chase down targets and get last hits but you can be damn sure you're contributing huge amounts of damage to your team, whilst simultaneously supporting them with an unbeatable backline to retreat to should things turn sour.
If you're going to gank then do it now, this is the only time where ganking is remotely viable, but you will have to plan ahead of time because your target will escape otherwise, always prioritise team fights > ganking.
During the mid game, your team needs you to be there for them, make sure you're also placing your wards so that you can always be aware of where your enemies are, good places are by the sides of the middle lane as most players use that section as a major crossing point. You should definitely be encouraging your team to go for OP Buff at this point as you can take it solo with very low risk, no risk at all with your team.
Late Game
I&S remains strong from mid to late game until everyone reaches the 60 point card limit, at which point he becomes average and the game is passed over to your ADC's. We can still focus on supporting team members and giving them safe places to retreat to whilst discouraging enemies from trying to use their escape routes and clearing out minion waves in a matter of seconds, even super minions. Our main role at the end of the game is base defense though as we're perfectly set up for it and excel and keep the core defending when there are inhibitors down.
Focus on base defense and keeping lanes pushed towards your enemies side, when teamfights to break out use your turrets to provide safe areas for your team and engage only after your initiators have taken the brunt of the initial damage.
Keep pressure on the enemy in team fights by using your Oil Spill as frequently as you can (aided by your CDR) to force them to either react or disengage from the fight, when fighting on enemy inhibitors and towers make sure you use your turrets aggressively to help keep enemies off of your team whilst they deal with the structure. I&S can also easily solo buffs at this point, so don't neglect OP buff and the Black buff to help your team deal damage.
Card Build
We do of course take the Archmagus Prime card.
I've chosen these cards to make sure that we have enough mana to sustain our abilities and CDR to use them enough during engagements to make a difference, I don't go pure energy damage because I&S's scaling isn't the best but it doesn't need to be because we can spam turrets all day which can deal huge amounts of damage over time, I have tried pure damage, support and armour and the pacing of this build seems to feel the best to me. Admittedly I still have more cards I'd like to use and try but I've yet to unlock them.
I start with Meltdown because it gives me the most immediate return for my 3 CP, and if I have 6 CP when I first recall I can sell my ward and pick up two cast upgrades off the bat, this gives me a massive 45.6 extra energy damage after my first recall, which really makes the difference for the early game damage and gives you a big advantage over people who choose to take two 3 cost cards which yields 37.9 energy damage damage if using the same card, though most people will take an item with a low initial power boost at 7.6, which means they'd have 30.3 energy damage. As you can see this means that you're doing more damage in either case after your first recall that will give you the small edge that I&S requires.
Following Meltdown our turrets will be upgraded and then they'll be ticking for something around 25 damage each time they hit, at level 6 we can have 3 turrets which hit for about 37 a tick which equates to something like 121 damage every 1.5 seconds, which is absolutely crazy at level 6 and that isn't even taking your other abilities and ultimates into account. Now this will vary based off of resistances and I need to do some more testing but since our damage easily outclasses other heroes I choose to take some Mana and CDR after I've slotted my Major Cast into my Meltdown for a further 22.7 energy damage and the 7.6 full card bonus.
I take Lord's Ward now because the damage is fine and we need the Lord's Ward to render Kallari useless and keep ourselves alive since we sold our ward for the damage increase, I slot 2 normal Mana's and an Advanced Chrono into this which gives me the staying power and mana I need until I've completed my Wellspring Staffs.
Since we're looking good for the CD on Oil Spill and have enough Mana to sustain through an extended battle we want to go back to our damage options, Wellspring staffs fit this role perfectly because they provide a nice damage boost and more mana since we're pretty mana hungry throughout the game. Once we've completed these the bulk of our damage is in place and we're more or less sitting pretty until the end of the game for damage which is why I take some more CDR at this point.
The main reason I take Pendulum of Lords is because it provides some decent stats overall, but at the game progresses our turret power drops off and we become more reliant on our Oil Spill damage, which has a fairly long cooldown, but combining two Chrono's and an Advanced Chrono along with the passive stats from the Pendulum of Lords we're looking at some damn nice CDR which helps us stay relevant towards the end game.
Finally I take a Shadow Scroll for a bit more penetration, again to make our Oil Spill more effective and slot that with a Shock, Cast and Minor Cast to bring our total card points up to 60, which makes us 100% efficient in this build, along with covering I&S's weaknesses when they occur.
Card Substitutes
From best to worst >
Meltdown > Shadow Scroll > Wellspring Staff > Staff Of Adamant
Pendulum of Lords > Burnblood Powder > Chrono-Mancer Disc
Wellspring Staff > Staff Of Adamant
Shadow Scroll > Wellspring Staff > Staff Of Adamant
Lord's Ward > Magus' Ward > Sage's Ward > Sorceror's Ward
Turrets, Turrets, Turrets.
Alright, I said I'd detail how to use your turrets the correct way and I will, though there is a total lack of good imagery to use so I'll have to look at recording a video in the near future to demonstrate better, for now, I'll detail general strategy and some good placements as best I can.
Think of your turrets like wards, that's my first tip. They function as such and should be used similarly, they're not just a front-line defense due to the fact they last for a period of time. You should always have a turret placed defensively, somewhere that you can either be attacked from or escape to, serving a dual purpose. The first examples of these are the left and right lanes. You can place a turret in the walkway from the shadow well which will give you a nice alert that someone is on their way and knock them out of travel mode if they weren't paying attention, giving you ample time to react, at the very least they'll have taken damage, lost time and the element of surprise which is usually all it takes to avoid getting ganked.
On the same topic, throw a turret down into the jungle from one of the "secret" entrances and exits that are signaled by a ledge. Most players will activate their travel modes as they drop over the ledge which means a well-placed turret will catch all of them out and give you all the time in the world to waddle away, better yet is the fact you can easily turn a definite death into a winning team fight if your team is paying attention and on their way to assist you, once they're all rooted throw a few more turrets down in the narrow corridors which will keep them busy and as your team arrives use your Oil Slick and Flame Breath to decimate them.
I&S is an extremely delicate hero, it doesn't take much to kill you which is why we have to become masters of map awareness and control, before a team fight breaks out you should already have an idea where it's going to happen, in this respect I&S plays very similarly to Kallari. You don't engage with your team, once you've established that this fight is going to happen, take the time to get behind the enemy team from the jungle and throw down your turrets on their likely escape routes back towards their base. You'll be surprised how close you can get to an enemy until they notice you since there are only a few players who regularly check their mini-maps. Once you've blocked escape routes (ways into the jungle, the main lane itself depending on where they've pushed up to) then you can go in with your other abilities whilst your team pushes from in front. Does it require co-ordination? A little yes, but it's usually fairly effective regardless.
At this point, the enemy is going to panic because a 5v4 just turned into a 5v5 and your team has the advantage so the natural thing to do is to retreat, straight into your waiting defenses which will prevent travel mode and allow your team to catch up. Once your initial wave of defenses has been passed or sprung you can start to place new turrets either ahead of the enemy to keep the pressure on or into their team if they're going to stand their ground, either way they're being punished and confused whilst they're still trying to work out what the hell is happening.
The speed in which you can predict and set up your defenses is what marks the difference between a good I&S player and an amazing I&S player.
When you're facing a melee opponent that has decided to engage you, make sure that you have 3 turrets in a triangle formation, spaced a little to prevent instant AoE destruction and then run around them with your Oil Slick and throw your Oil Spill on cooldown. This will force them to fight you on very unfavourable terms, whether they flee or fight at this point activate your Flame Belch to finish them off or force them off of you if you're still somehow losing the fight.
I&S's weakness is mostly perceived as they're extremely dangerous when engaged recklessly due to the sheer DPS of your kit. Don't be afraid to turn around at fight your pursuer as you'll be surprised at how quickly you can burn someone down once your turrets are out, whether you're stunned or slowed your turrets can't miss and can't be stopped unless destroyed, don't be afraid to use them.
After testing the theories that turrets can crit, it appears that this is not the case.
Turrets & Their Effectiveness At End Game
One of the problems I&S face at end game is a change in their roles, much like the other mages, although we are probably one of the least affected due to the versatility of our kit.
Once players start to reach their 60 point builds you'll find that our turrets aren't don't seem to be doing as much as they did previously and although this isn't technically true I'll tell you why it seems to be. As players get larger HP pools and our turrets no longer continue to scale due to our full build they become less worried about them and start to ignore the damage and push straight through, which severely limits their damage potential, likewise, they can now spam their abilities without fear of mana and ADC's can attack faster.
This all comes together to mean that we're no longer as much of a threat in team fights as we were, but this only really happens in the extreme late game which is excellent because games rarely get to that point. I personally find that I can put more pressure on the enemy team by utilising the damage from oil stacks and the Oil Spill detonation and then use my turrets to hold off enemy minions or super minions if they're present.
Turrets still have their uses though, surrounding the enemy core or tower you're fighting under with turrets is an amazing way to guarantee damage for enemies trying to defend their structures, if you can force people into your turret fire then they will always do your best damage, it's just finding way to force them to remain in those areas for long enough and taking structures is a great way to do this.
I like to use 3 turrets just behind the enemy core to help keep them at bay whilst we're finishing things off, as the turret damage combined with your team mates really makes a difference.
Laning
As briefly mentioned above we need to be very careful as the game starts, we don't have all of our kit available and we're particularly vulnerable to ganks due to a sub-par escape and fairly large body (read bigger hitbox). Your lane opponent should never be able to bully you or win trades but if you stop concentrating and you're taken by surprise you're screwed.
Actually, I&S is king of staying put, as long as you know what's happening around you. If you've played your first few games and you're feeling more comfortable with him then ditch your health potion for two mana potions. Once you're happy with two mana potions you'll find that I&S are the kings of laning and even against two opponents you're not even breaking a sweat maintaining your turrets and last hitting due to their awesome zoning potential. You should always keep that defensive turret alive for surprise visitors but otherwise, make sure your enemies have to either take turret fire or destroy the turret and lose CS, either way, you win.
If your lane opponents start to get a bit cocky and try to push you off the lane by charging through your turrets, don't worry. Drop a turret on top of yourself and throw down an Oil Spill and just dare them to walk through it, if they do then they'll have to accept the damage from the explosion followed by the increased auto attack damage, and then take the flames from your turret, if they're still going then use your ultimate to literally force them away and if they don't... well you win again.
When an ally is coming in for a gank, deliberately take some damage and let the enemy push you to your turret, from there you're in a perfect position to spit some oil and go on the offensive whilst they try and retreat back to their tower and directly into your team mate. Should you opponent engage at any point and is staying in the are to fight then feel free to throw turrets at them, it's amusing to see how people try and deal with them and you're also doing constant damage that's wearing down.
When pushing an enemy tower keep one turret down on the entrance from the jungle and the other two just outside of the enemy tower's range until you're ready to push onto the tower platform, when this happens deploy two turrets in line with the enemy tower to form a wall for incoming minions (this helps by killing them and keep your minions on the tower for more DPS) and one directly behind your team so that it'll stop any travel mode ganks coming too close and give your team time to react.
Be creative in how you go about assisting your team, there's no right answer but you shouldn't use turrets like skill shots, throw them where the enemy is going rather than where they are for maximum damage, exceptions to this rule are when an enemy is slowed or in immediate danger of getting stunned, at which point pile on the oil and turrets.
Jungling
Although I&S is extremely powerful in lane he's also a bit of a hidden gem when it comes to jungling, his clear starts off pretty slow but by the time you're level 3 you fly through the jungle mobs in a matter of seconds and don't even take much damage! I&S can also solo kill Orb Prime and Black Buff at level 8, which should leave you with about 50% HP. Though this is a bit of a controversial play, it can be used for a really early OP buff as long as your team expects it, though I don't usually encourage using what could be considered an exploit, you don't have to stay with the turret until the mob dies, you can start towards the next set just before and still have the XP & CP come to you so long as your turret finishes the target. Likewise, if you let your turrets finish the Orb Prime boss the Orb Prime will come flying to wherever you are.
I've yet to play a PvP match where I've jungled I&S but I do intend to do that soon and put in some more tips for how to succeed. I&S is a competent jungler with some of the fastest clear speeds and his turrets are perfect in the narrow corridors of the jungle, so definitely give that a go! If jungling I recommended you take a Health Potion, Mana Potion, Mana Potion start so that you can stay there for longer, I'd also switch the Lord's Ward for a Harvester Key of your choice so that you can cap them if someone else hasn't, slower harvester capture is actually the only downside I can think of.
Ganking
Although I don't recommend going for ganks unless you're 110% certain you're going to survive and get the kill your best bet is to look for kills on the side lanes where a lone enemy player has pushed up to your turret, simple run behind them, drop your turrets on their escape path and then engage them with the Oil Spill and Flame Belch combo which will bring them low, but not finish them. At this point, you'll be defenseless so you need to steer them towards your turrets until your Oil Spill is ready again, at which point throw it onto the turret and more likely than not they'll run straight into their death.
Matchups
-Strong Against-
 Kallari
It's actually upsetting how bad Kallari does against us, she can stealth but since we're usually in a fairly defensible position near our tower and our turrets can see her due to our Lord's Ward which means that if she wants to get close to us she has to run through our turrets and her HP can't sustain that damage. Kallari, as she stands is the least threatening hero.
Grux
Grux looks scary, he is scary! Though he isn't really a threat to us. If he wants to attack us he's going to have to subject himself to our turrets and Oil Spills which will whittle him down a lot faster than you'd expect, combined with our Flame Belch and that's a dead Grux every time. The exception to the rule is if he builds armour but then he's still not a threat.
Feng Mao
Feng Mao is probably the toughest of the enemies we're strong against, but he's still melee and that means he's going to have to take our full damage to trade with us. Use your Flame Belch to knock him back when he tries to use his ultimate and it's a victory every time.
Steel
Steel, well he's a threat isn't he? No not really. We have a little energy pen from the outset with this build and unless he's focusing entirely on energy armour we're going to win a damage for damage comparison, he has to sit in our turrets and fight us on our terms, meaning we'll usually win, our turrets also keep firing whilst stunned and if he throws down his wall you just replace turrets. Nothing to worry about.
Rampage
Strong against Rampage? Are you high? That's WRONG! I'm afraid it's not wrong though because we're the ultimate deathball counter, Rampage simply cannot stand in our turrets and abilities taking full damage for long, and even when he uses his ultimate he finds himself running away because he can't compete with our raw DPS for long. Since stunning us won't stop and he can't AoE our turrets down it's sad times for Rampage.
-Evenly Matched-
Twinblast
Twinblast isn't really a problem for us but he's also not particularly easy. We're going to be able to win most trades because TB has no AoE to deal with our turrets and he's going to be forced to attack our turrets before he can move up to attack us. If the TB player is dumb enough to ignore our turrets he'll die, but any smart player is going to be evenly matching us. Save Flame Belch to counter his ultimate, as it'll knock him back far enough for you to get out of range.
Howitzer
Howitzer is much like us, he focuses on zoning to allow him to farm and trade however, we do it better. Howitzer can take out our turrets from range and attack us comfortably without being in range of our turrets so we need to be cautious, but proper positioning makes it a pretty even match up, we do out scale him in the mid-game though.
Dekker
Dekker isn't much of a problem for us but she can trap us with her ultimate, giving her team time to catch us up and her stun is a pain the ass. Dekker should never win a trade against us but we have to be extra cautious around her, lest we be ganked.
 Gadget
Haha, Gadget... Actually no, she's a good match for us because we're both slow heroes that rely on damage over time, ours is more consistent which allows us to farm more effectively but hers does have the edge on burst, she'll be able to farm regardless of our turrets with her sticky mines and her acceleration gate/ultimate can really punish us for over-extending.
-Weak Against-
 Sevarog
This plastic bag is actually a real issue for us due to the fact that he can smash us out of our little turret palace and into the cold wilderness and then keep us there. He's not too threatening on his own but he can absolutely wreck our day with his team when played correctly, be very careful of Sevarog.
 Muriel
It's Muriel... though joking aside her main threat isn't so much her, but what she can do for her team, her shields negate a large portion of our turret damage which means that our enemies can waltz right through our glorious defenses with impunity which is a real pain. Although it's a problem she doesn't render us entirely useless, but if we play the game on normal usually, Muriel pushes it up to hard.
Murdock
We actually do really well against Murdock early game, I've secured a lot of kills because he has no escape and can't really do much about us, however, this changes fast and he becomes really threatening late game, two shotting us (like everyone else) meaning we can't do anything.
 Gideon
Hiss, Gideon. His Cosmic Rift murders our turrets and basically renders us useless, we're rarely going to win trades against Gideon due to his two AoE's but the chances we'll be fighting against him in mid lane are low. If you are against him then I wish you good luck, because a good Gideon players is going to wipe the floor with you.
Sparrow
Much like Gideon, Sparrow can easily take out our turrets with Hail of Arrows and is going to be a fairly tough lane opponent, she's not terrible early game as Hail of Arrows costs her a lot of mana but combine that with her long range poke and you're going to be hugging your tower for the rest of laning period. Play carefully and stay safe.
 GRIM.exe
GRIM.exe poses a whole host of problems for us, we can't knoc him back due to his sheild, he can displace us with his knockback and slow us with his auto attacks, to top this all off he can still gank us from halfway across the map with his ultimate, avoid when you can.
Patch Notes (Credit to Anrothan for the idea)
v.25.0
- Adjusted timing and location for Iggy & Scorch's Oil Trail.
- Updates and polish to Flame Belch animation.
- Ultimate duration reduced from 5 to 2.5.
- Fixed an issue where Iggy's Turret decal would change color after rejoining.
v.24.1
- Ability tooltips descriptions fixed.
- Fixed a bug where Iggy & Scorch would pop back into their idle state at the very end of Recall.
- Fixed a bug where Iggy & Scorch's Cooldown was reading 15 when it should be reading 1.
Change Log
13/05/2021 - Switched a Wellspring Staff for Tainted Magick
- Edited card upgrades to match the 9|9|10|10|10|12 format
11/05/2021 - Added findings on turret crits.
- Added second deck.
- Added card substitutes.
- Added Patch section.
- Changed card presentation.
- Added GRIM.exe to hero match ups.
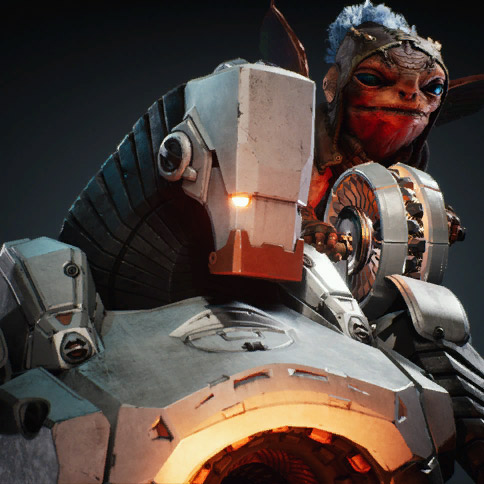
- Updated hero portraits to new versions.
- No longer making a turret video due to time constraints.
26/04/2021 - Added write-up on item choices and why I've chosen them.
- Added short introduction to jungling as I&S.
- Added Flame Belch to Abilities section.
- Added hero match ups.
- Added some more information to Turrets, Turrets, Turrets section.
- Added Change Log section.
- Added a little more information to Muriel.
- Added Turrets & Their Effectiveness At End Game section and information.
- Fleshed out ability information and fixed some typos.
- Added ability keys.
- Added two new ability combos.
25/06/2021 - Created guide.
Why take the Meltdown as your first dmg card? Do you really expect your opponents to have energy armor that early in the game to where you need armor pen? I find it hard to justify armor pen even late game. I would think a Micro Nuke might be more useful at the start?
I take the Meltdown for the 15.2 energy damage spike because the average 7.6 doesn't make quite enough of a difference at the start, the armour pen isn't ideal so early in the game but it is useful late game regardless so it's not a complete waste and it gives you the edge vs. early game tanks. I wouldn't use Micro Nuke because that gives you a tiny bit of crit chance which is entirely useless and since we're taking two mana potions once we're a bit more experienced the mana from Wellspring Staff is more of a replacement for them, so it makes sense to get as much power as you can, as soon as you can. Meltdown is ideal for this. To add to this, because we're taking a non-damage item second we want the most damage possible until we take our two Wellspring Staffs, energy penetration does contribute to our damage, if only a little.
@Kizr, this is an awesome guide with quite deep analysis. I did really enjoy reading all of this. I wish we can combine it with a wiki-like One-Stop guide for Iggy but it seems that this one a kind of more complete. I hope you keep supporting it.
I have a couple of questions to add:
@George, thanks for the feedback.
Grux - I've had a Grux in a few of the matches I've played as I&S so far and I've found that he only really looks threatening. With the strafe changes, it's horribly easy to dodge his pull and I usually hold off on my ult until he uses his, which most Grux players will immediately use for the damage increase. Granted a good Grux player will wait to use their ultimate to interrupt ours and then that would cause us a few problems but all in all Grux's kit doesn't lend itself to the sustained damage of our kit, he has to make contact with us to DPS and with kiting & Oil Slick he's almost always going to lose the encounter if you expected him. I wrote the Grux section based on the fact that you're locked in a battle with him to the death, as a Grux will usually engage to kill, if he flees then he will escape I&S can't chase for anything, but if he wants to stick it out I'll be I can survive almost every time :)
Muriel - I guess I should flesh it out really, but it is a bit of a running joke isn't it? I'll add information to that in a bit but it's more the threat of having her around, rather than her in herself. Her shields counter a lot of our turret's damage and she can essentially negate our usefulness in team fights, which is the real pain. Her slow is also really annoying to be hit by because it severely limits our escape options.
Scaling - I've found so far that whilst the turrets damage gets to about 70-80 with a fully kitted out build, the amount of health the enemy team has really limits their effectiveness as they're no longer worried about charging through and losing 1/10th of their HP, so it's not so much the turrets scaling but the threat of them VS. the enemy. They're still great for damage when a team fight is going but you can't really control the fight anymore because people can and will ignore them at that point.
As for Oil Spill it does instant damage - around 380 I believe with this build although I do intend to add actual numbers, I'll probably run a bot game tonight to gather some data on the figures, it's more the psychological factor due to it being a larger damage spike. On carries, it's around 1/4th of their HP which doesn't seem like a lot (we do fall off though) but it can make the difference.
Given the choice turrets are still optimal but it just becomes so much harder to utilise them when everyone has their full 60 point builds, so essentially it becomes more efficient to use your Oil Spill as your primary damage because it's a lot easier to consistently hit, but always use turrets when you can.
It's still early days for this guide and my experience with I&S and I do intend to keep this updated as I learn more due to me maining them now, some of my points might turn out to be wrong after a few more games played but as it stands I think this is the best way I've found to play him :)
If you like anything that I've said here you can feel free to add it to the One-Stop guide, I'm not worried but because it's mostly opinion at this point I didn't feel comfortable adding it to a guide that should be fact based (as it's a community guide)
"I take the Meltdown for the 15.2 energy damage spike because the average 7.6 doesn't make quite enough of a difference at the start"
Micro Nuke gives 15.2 energy at the start and gives you some crit rather than pen. I'd personally think that's a better choice over Meltdown to start.
@Gramatik,
As I said, crit is a useless stat on a caster, auto attack damage is fairly irrelevant and I only upgrade it over Oil Slick because I personally don't think Oil Slick is as good as it should be.
With the 4% crit chance that Micro Nuke gives you, you'll be critting 1/25 auto attacks which, to be honest, isn't worth the investment. Whilst energy penetration isn't a massive damage increase either it's still counting towards your late game damage whereas crit isn't, thus the logical choice is obviously Meltdown because it's getting you more of an advantage throughout the entire game.
Micro Nuke is for energy damage which relies on auto attacks.
Meltdown is for energy damage that relies on abilities.
@Kizr,
Hey man great guide. Glad to see others with faith in the glass cannon Iggy build. One suggestion that I've got, (and I've never seen another iggy with it) is tainted magick as a damage card. The active adds poison to your abilities for 6 seconds. The poison stacks on ability hit, and with the tick speed of all of our abilities, you'll hit max stacks almost immediately. This is a huge boost in DPS that I'm pretty sure ignores armor, so tanks are going to feel it. What's more is the DPS increase is deceptive. Most people won't notice when you activate it and either die or are forced to back off. Even if they do escape, many do not account for the poison and die to its lingering effects. I've killed fully built carries that I've gotten the drop on, as well as rampages after he jumps out. I've even killed a rampage that simply burned out before he received the health from his ult. I'd love to hear your opinion on it if you give it a try.
@Ziggy,
I like that idea, I do have Tainted Magic so I think I'll try that out tonight, the downside is that we're sacrificing some stats for the crit, but I suppose if it makes a huge difference the trade off isn't so bad. I've been wanted to add some alternative decks here so that people have options, and add a replacement card section for those who haven't been lucky enough for certain cards. I saw someone talking about a crit build on I&S, taking advantage of the default turret damage and passive damage in general, to focus on going for a Crit/Energy damage build. This could potentially work very well with Tainted Magic, so I'll build a few test decks and report my findings!
Truth be told I was supposed to update this sooner but I've had a crazy few weeks with work so I haven't had time, I will get around to rectifying that though, not to worry.
@Ziggy (not verified),
OK, I tested Tainted Magick and I have to say it's a badass card that I never even considered using, so thank you for pointing it out, full credit to you for finding it!
I have added the card to my build :)
Wow dude, awesome guide.
One of the better guides I've seen on here. Looking forward to trying I&S out :)
Awesome build - I hope you keep with it. Any thoughts on Bump Juice?
Just tried I&S out for the first time last night. enjoyed him. enjoyed your guide cant wait to try somethings out.
Great guide, i'll give it a try. Iggy is such a beast on the lane. Need to check, if a have those cards you suggested ;)
I replaced some cards of the glass cannon build, because I don't have all of them. I rushed Shadow Scroll (Major Shock, Major Cast, Major Cast) and did my first pentakill in last match. Thank you for your build and here is the proof :D
https://www.youtube.com/watch?v=vmadXn9Dels&feature=youtu.be&pxtry=3