Introduction
Hi! My name is rad619619 and I noticed that a lot of decks on Paragon aren't all that great. A lot of people simply miss the mark when it comes to the unique challenges of working with Paragon's Card Power system. I am here to tell you about a system I created for making effective decks that capitalize on the unique design of the item system in this game.
Table of Contents
- Paragon's Unique Gold Mechanics (The "Power" System)
- Earning an Advantage
- How to Build a Deck (Beginner)
- Advanced Deck-Building
- Notes on Specific Items
- Deck-Builder Tips
- Post-Scriptum Notes
- FAQ
- Parting Words
Paragon's Unique Gold Mechanics (The "Power" System)
Instead of earning gold to buy items, Paragon features a system where you level up your Power and earn 3 Power to spend every time the power bar is filled. Every player will max this bar out at 60 Power. If you've taken a look at the items available to you, you probably noticed that each point of Power translates roughly to 6.5 Physical Damage, 6.5 Energy Damage, 100 ![]() Health, 75
Health, 75 ![]() Mana, 2.5
Mana, 2.5 ![]() Lifesteal, etc. Therefore, you'd expect that each player's final build will essentially be a distribution of 60 Power into the stats available in the game, and how they distribute these points will determine the effectiveness of their build. Someone who chooses to spend 30 Power on
Lifesteal, etc. Therefore, you'd expect that each player's final build will essentially be a distribution of 60 Power into the stats available in the game, and how they distribute these points will determine the effectiveness of their build. Someone who chooses to spend 30 Power on ![]() Mana on a hero like Khaimera won't be as effective as someone who spends those 30 points on Physical Damage. This is very different from every other MOBA on the market and most other games, as the gold you earn cannot pile up infinitely and, while the item strengths stay the same, the relative difficulty of purchasing more of them increases as you earn more Power and the bar becomes more difficult to "level up".
Mana on a hero like Khaimera won't be as effective as someone who spends those 30 points on Physical Damage. This is very different from every other MOBA on the market and most other games, as the gold you earn cannot pile up infinitely and, while the item strengths stay the same, the relative difficulty of purchasing more of them increases as you earn more Power and the bar becomes more difficult to "level up".
What many players fail to realize is that you are actually distributing 66 units of stats to your hero - 60 of them coming from Power and 6 of them coming from the value of each item slot (card slot, but calling everything a "card" in this game gets confusing so I'll stick to traditional MOBA terminology). If you have noticed, every item in the game that is worth 3 Power will give a total of what 4 Power would normally buy you once you reach an item's "Fully Upgraded Bonus". An Adamant Edge will give you 6.5 Physical Damage and 100 ![]() Health (or 1 Power's worth of Physical Damage and 1 Power's worth of
Health (or 1 Power's worth of Physical Damage and 1 Power's worth of ![]() Health) and then an additional 13 Physical Damage (or 2 Power's worth of Physical Damage) when fully upgraded. 3 Power's worth of Physical Damage and 1 Power's worth of
Health) and then an additional 13 Physical Damage (or 2 Power's worth of Physical Damage) when fully upgraded. 3 Power's worth of Physical Damage and 1 Power's worth of ![]() Health add up to 4 Power's worth of stats for only 3 Power. This is why every player will, upon maxing out their hero at 60 Power, be playing with 66 Power's worth of stats.
Health add up to 4 Power's worth of stats for only 3 Power. This is why every player will, upon maxing out their hero at 60 Power, be playing with 66 Power's worth of stats.
Here is where most players fail: Every time you fully upgrade a piece of equipment, you are essentially being given 1 free point of Power. Everyone will earn 6 of these free points over the course of the match, but whoever earns these 6 points earliest will have an advantage. Then, you also have to stay mindful of what you're doing with these points in order to fully capitalize on your chosen hero's unique strengths and weaknesses. I will explain in-depth how to do the former below:
Earning an Advantage
Let's address this first: Any guide that tells you to get 6 items that cost 10 Power each is failing you. Any guide that tells you your first item should cost you any more than 6 Power when it is fully upgraded is failing you. Just because you are going to be earning 6 free Power does not mean you have to earn those points after every 10 Power you earn. Ideally, you want to front-load as many of these free Power points as possible. To do this, you want to max out as many of your early cards with 1-Power upgrades as possible while still maintaining the ability to hit 60/60 Power spent by the end-game.
How to build a Deck (Beginner)
First, determine which stats are most important to the hero you are playing. For our example, I will use my main hero Khaimera. Khaimera's first and foremost priority is Physical Damage. His second priority is widely debated in the community (![]() Crit Chance vs.
Crit Chance vs. ![]() Attack Speed) but I prefer to build
Attack Speed) but I prefer to build ![]() Attack Speed as I feel it is a better deal, despite being useless for his first ability, Unleash. After building Physical Damage and
Attack Speed as I feel it is a better deal, despite being useless for his first ability, Unleash. After building Physical Damage and ![]() Attack Speed, I would normally build a bit of
Attack Speed, I would normally build a bit of ![]() Health in order to increase Khaimera's survivability. Other heroes will have different priorities.
Health in order to increase Khaimera's survivability. Other heroes will have different priorities.
Starting Items
The first items we are going to pick are your starting items. Most heroes play best with a combination of a Health Potion, a Mana Potion, a Harvester's Key, a Scout's Ward, specialty potions, and stat tokens. Sticking with our Khaimera example, I usually open with a Health Potion and two Strike Tokens to give me the capability of an early first blood with Unleash. The items chosen here depend largely on the role you're filling and play style, although my experience says that anyone who doesn't grab a healing item in their opening hand is a noob.
Now, let me bring your attention to another pitfall new players often fall into: buying a 3-Power item using their starting Power. There are several major problems with this start. Firstly, the Health Potion and Mana Potion are currently balanced in a way that makes their utility hard to compete with as 1-Power cards at low levels. This is because they give a flat rate of ![]() Health Regeneration and
Health Regeneration and ![]() Mana Regeneneration, which is most powerful when everyone's
Mana Regeneneration, which is most powerful when everyone's ![]() Health and
Health and ![]() Mana are still low and every hero is doing less damage. No 3-Power card in the game competes with their utility. Even heroes that do not require a Mana Potion (such as most
Mana are still low and every hero is doing less damage. No 3-Power card in the game competes with their utility. Even heroes that do not require a Mana Potion (such as most ![]() fighters) or a Health Potion (such as some
fighters) or a Health Potion (such as some ![]() Casters and
Casters and ![]() Supports) can still find more utility in other items. The next issue with starting a match this way is that a lot of the players who do so purchase 3-Power items that give 2 Power's worth of stats and will not be worth their value until they are fully upgraded. This is a grave mistake. If such a player is matched up against a player who chooses to instead spend those points on tokens or an item that gives 3 Power's worth of stats before being upgraded (such as Impact Hammer), they will have 3-Power's worth of stats compared to your 2 Power's worth of stats. This means that they have a whopping 150% of your Power's worth of stats (or, in other terms, you only have 66.667% of what they have) and, coupled with your handicap of being unable to heal yourself from lane harass and the occasional accidental minion aggro, you are making yourself a very easy target for first blood and possibly hurting your ability to keep up with your lane opponent beyond this point. In fact, now that I think about it, I think I will start checking opposing teams for what their starting items are and actively trying to hunt down anyone who starts with a 3-Power item. I cannot stress this enough; do not start any match with a 3-Power item unless you are absolutely certain of what you're doing.
Supports) can still find more utility in other items. The next issue with starting a match this way is that a lot of the players who do so purchase 3-Power items that give 2 Power's worth of stats and will not be worth their value until they are fully upgraded. This is a grave mistake. If such a player is matched up against a player who chooses to instead spend those points on tokens or an item that gives 3 Power's worth of stats before being upgraded (such as Impact Hammer), they will have 3-Power's worth of stats compared to your 2 Power's worth of stats. This means that they have a whopping 150% of your Power's worth of stats (or, in other terms, you only have 66.667% of what they have) and, coupled with your handicap of being unable to heal yourself from lane harass and the occasional accidental minion aggro, you are making yourself a very easy target for first blood and possibly hurting your ability to keep up with your lane opponent beyond this point. In fact, now that I think about it, I think I will start checking opposing teams for what their starting items are and actively trying to hunt down anyone who starts with a 3-Power item. I cannot stress this enough; do not start any match with a 3-Power item unless you are absolutely certain of what you're doing.
Card Choices
Next, we are going to select the 6 items we will build, in order, to eventually reach our end-game potential. The trick here is to realize that the items we grab early are going to be fully upgraded with a combination of 1-Power and 2-Power upgrade cards, while our endgame items will ideally be fully upgraded with nothing cheaper than 3 Power. This will push our fully upgraded bonuses to be earned early. Another thing to watch for here are items that allow you to get your stats early. For example, I view Impact Hammer as a strictly better version of Spear of the Rifthunter as it gives you 3 Power's worth of stats when it is bought and 1 more when it is fully upgraded as opposed to giving you 2 Power's worth and then 2 more when fully upgraded. Both still add up to 4 Power's worth of stats, but Impact Hammer gives 6.5 Physical Damage earlier (Note: I know that Impact Hammer is 3 Power's worth of Physical Damage and 1 Point of Crit Chance while Spear of the Rifthunter is 2 Power's worth of each, but this difference can be offset by the upgrades you choose to put on each item).
Core Items
Our first four items should be dedicated to the stats we wish to build, which I will refer to as "core" items. The last two items will be "flex" items, meaning they are versatile and can be built according to the situation you're in. We build our flex items last because they are meant to give you a situational advantage over the end-game, and building for the incorrect situation in the early or mid-game can cost you the match if the situation suddenly shifts. The first of our core items is going to be maxed as early as possible because, you guessed it, we want an early Power advantage. The other thing to note here is that the advantage from each point of Power is greatest when each hero has very little of it, and drops off as the round continues. Having 7 Power's worth of stats while your opponent has 6 means you have 116.67% their Power while having 58 while your opponent has 57 means you have 101.75% of their Power, and the early advantage becomes even more significant as each hero's natural stats are still low due to their low level and have relatively less impact than items.
There is one more very basic thing to mention: Power is earned in 3's, meaning that any time you come to a point in your build where you cannot spend all your Power you are at a slight disadvantage. This disadvantage, like the Power advantage we talked about previously, is exceptionally pronounced at lower levels. Having cheaper items at the early points in your build will help with making sure you can always spend that extra leftover point of Power. If you have enough upgrade cards to not be limited by the availability of any one kind, you can also try and adjust your build so that at no point during its construction will you ever be at a disadvantage by ending up with unspent Power.
Flex Items
The last two items are our flex items and these are generally built for versatility. Ideally, I like to have 1 trade-off item and 1 armor item here.
The trade-off item is an item that has both 1 of your character's main stats (which, since it is being focused on, is going to be fairly high and can be given up more easily than other already low stats - with a few exceptions) and one stat that you might need more of if the match isn't going your way (such as physical/energy penetration, if the enemy team is building armor against you, or health if you notice you're dying too quickly to be useful). This way you can build one of your primary stats if you feel that you do not need your versatility stat, and build up your versatility stat if it would benefit you more than increasing one of your primary stats.
The armor item is an item you build to have access to either Physical Armor or Energy Armor. It allows you trade a stat that is generally useful (for most builds this stat will be ![]() Health since Tempered Plate and Tuned Barrier are the most easily accessible armor items) to gain more armor against a specific damage type. Generally, you build this to counter the opposing team's strongest carry or carries. If you notice the enemy team seems well balanced, but all their
Health since Tempered Plate and Tuned Barrier are the most easily accessible armor items) to gain more armor against a specific damage type. Generally, you build this to counter the opposing team's strongest carry or carries. If you notice the enemy team seems well balanced, but all their ![]() Tanks and
Tanks and ![]() Supports are physical while that Gideon and Murdock seem to be doing all the damage, it is a pretty good sign you should be building Energy Armor. If you notice the entire enemy team is made up of Physical Damage heroes, it is a pretty good sign you should be building Physical Armor.
Supports are physical while that Gideon and Murdock seem to be doing all the damage, it is a pretty good sign you should be building Energy Armor. If you notice the entire enemy team is made up of Physical Damage heroes, it is a pretty good sign you should be building Physical Armor.
Unique Active and Passive Effects
Now that we figured out what stats we are going to build, take a look through your card library and see if there are any unique passives/actives that you would like to include in your deck. Remember that you can calculate how much a unique passive/active is worth by subtracting the stat bonuses from the item's Power cost +1. For example, a standard 3-Power stat-only item would give us 4 Power's worth of stats once fully upgraded. For example, Blade of Agora gives 1 Power's worth of Physical Damage and a unique passive of 50% Crit Bonus, which means that, as a 3-Power item, that unique passive must be worth 3 Power to bring its strength up to the standard 4 Power's worth of stats that we expect of 3-Power items when they are fully upgraded. Is that extra 50% Crit Bonus really more worthwhile than an extra 3 Power's worth of another stat, such as 19.5 Physical Damage? If it is and you wish to purchase this unique passive/active in your game, ask yourself the following: When would you like to earn these passives/actives? Are they the most helpful in the early game or the late game? Would you prefer to earn a unique effect early or would you prefer more stats early on instead? This unique item will replace one of your core items, but which specific core item it replaces is up to you. However, it is important to remember that you will only be able to upgrade it with upgrade cards that match its stat bonus. If you are building high Physical Damage and high ![]() Attack Speed and you're using a unique active/passive that can only be upgraded with Physical Damage, expect to put more Attack Speed upgrades in your other items.
Attack Speed and you're using a unique active/passive that can only be upgraded with Physical Damage, expect to put more Attack Speed upgrades in your other items.
Most unique active/passive items cannot replace flex items because they only have 1 stat, meaning they can only be upgraded for 1 stat, but they can sometimes work as alternative items to your main build.
Tokens
There is one more type of item which I think should receive its own section, and that is the token. Tokens are 1-Power items that are purchased much like consumables and don't take upgrades. Tokens allow the player to directly purchase stats for 1-Power increments, which means they enable you to spend all your Power in situations where you might otherwise have to leave the base with 1 or 2 points unspent. They are also a better return on investments compared to 3-Power and 4-Power items that provide more than 1 Power's worth of their value after being fully upgraded. Take, for example, Adamant Edge. It gives the player 6.5 Physical Damage and 100 Health for 3 Power, and doesn't do more until after it is fully upgraded. If you were to instead spend that 3 Power on tokens you could buy yourself a Strike Token, a Health Token, and still have a point of Power left for another token or consumable. When you can't afford to fully upgrade such an item, tokens are a better value. However, compared to other items such as Impact Hammer, tokens provide no additional benefit. Notice that Impact Hammer gives 3 Power's worth of stats when it is purchased, and 1 additional Power's worth of stats when it is fully upgraded. Spending that 3 Power on tokens instead gives no additional value, and is actually going to be a detriment to you when you are striving to keep your deck under its 40 item/upgrade limit.
It is generally a good idea to put relevant tokens in your deck if you notice that your build leaves you with a few unspent points of Power at any point before you have 6 items equipped. It is also a generally good to try and use tokens in place of an early item if that item is going to cost as much but provide less stats until it is fully upgraded, selling the tokens once you have enough Power to purchase and fully upgrade said item.
Example Deck
Now that we have our general procedure figured out, it is time to fill out a deck. I think this is best explained by example so I will show how I'd build a very simplistic Khaimera deck below (my advanced Khaimera guide can be found here):
- Starting Items:
 Health Potion
 Strike Token
 Strike Token
 Flashfire Piston
 Minor Strike
 Minor Strike
 Minor Strike Total Power: 5
 Flashfire Piston
 Minor Kinetic
 Kinetic
 Kinetic Total Power: 7
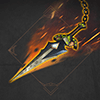 Windcarver Blade
 Major Kinetic
 Major Kinetic
 Major Strike Total Power: 12
 Adamant Edge
 Major Strike +
  Major Strike
 Major Strikeor
 Greater Health
 Greater Health Total Power: 12
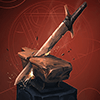 Rust-Breaker +
  Major Strike
 Major Strike
 Major Strikeor
 Major Pierce
 Major Pierce
 Major Pierce Total Power: 12
 Spiked Boneplate
 Greater Guard
 Greater Guard
 Major StrikeorThorned Greenweave
 Greater Barrier
 Greater Barrier
 Major Strike Total Power: 12
I usually grab the two Strike Tokens in my starting hand to have enough damage to score a first blood with Unleash. I sometimes pick up a Mana Potion or a Zap Juice in order to help with mana issues. Depending on your playstyle, the extra mana might be more useful than 6.5 Physical Damage. You can also choose to buy your Flashfire Piston early instead as it provides 2 Power's worth of stats for 2 Power, although 1 of that Power is spent on ![]() Attack Speed which doesn't provide as much utility as more Physical Damage, a potion, or a Harvester's Key would. I sell the Strike Tokens at 6 Power to replace them with Minor Strikes on my first Flashfire Piston, netting the the same Physical Damage from the Power spent on these but also allowing me to gain 5.5
Attack Speed which doesn't provide as much utility as more Physical Damage, a potion, or a Harvester's Key would. I sell the Strike Tokens at 6 Power to replace them with Minor Strikes on my first Flashfire Piston, netting the the same Physical Damage from the Power spent on these but also allowing me to gain 5.5 ![]() Attack Speed from Flashfire Piston's fully upgraded bonus.
Attack Speed from Flashfire Piston's fully upgraded bonus.
As you can see, we focus on Physical Damage and ![]() Attack Speed, with some wiggle room for more health, armor against a specific damage type (if all of the enemy carries are Physical Damage dealers, for example), and Physical Penetration (if the enemy is building Physical Armor). You can also see that the Flashfire Pistons are finished very early on and reward me with an extra 11
Attack Speed, with some wiggle room for more health, armor against a specific damage type (if all of the enemy carries are Physical Damage dealers, for example), and Physical Penetration (if the enemy is building Physical Armor). You can also see that the Flashfire Pistons are finished very early on and reward me with an extra 11 ![]() Attack Speed very early on. If I chose to include any more expensive items or upgrades, I would be able to use even more cheap upgrades early on and stack up my character even more quickly.
Attack Speed very early on. If I chose to include any more expensive items or upgrades, I would be able to use even more cheap upgrades early on and stack up my character even more quickly.
Just one more thing to add before we move on to the next point: if one or more of your items does not have a Fully Upgraded bonus, you do not need to fully upgrade it. If you're grabbing an item like Stasis Gem but don't want to build any more Energy Damage than what you have, you can choose not to put upgrades on this card and place more costly upgrades on the rest of your equipment instead.
This build ends up with the same total stats as any equivalent 10/10/10/10/10/10, 9/9/10/10/10/12, or 9/9/9/9/12/12 build but gains the 6 free Power's worth of stats sooner.
10/10/10/10/10/10 (excluding starting items) earns each point at 10, 20, 30, 40, 50, 60.
9/9/10/10/10/12 (excluding starting items) earns each point at: 9, 18, 28, 38, 48, 60.
9/9/9/9/12/12 (excluding starting items) earns each point at: 9, 18, 27, 36, 48, 60.
This build (excluding starting items) earns each point at: 5, 12, 24, 36, 48, 60.
As you can see, you are going to be ahead in stats when that difference is most pronounced.
PS If you enjoy playing 9/9/10/10/10/12 builds and don't think that you'd enjoy builds where your first item costs 6 or less, I strongly recommend you try a 9/9/9/10/10/13 build where possible. It will allow you to better utilize your item bar and allow you to hold on to your potions a little longer :)
Advanced Deck-Building
So you want to create a pro deck? It won't be easy, and it will probably require you to have a large library of cards at your disposal. It will also require you to think more actively about your deck and, often, such a deck will require some getting used to as it will be less intuitive than your current decks. If you want to play around with even more fine-tuning than what can be done with my standard deck theory, the following paragraphs are for you.
Firstly, we will start by doing an inventory of the optimal stat distribution and unique effects on our hero. Here we want to use the resources available to us (such as your favorite DPS calculator, replays from past matches, George's Armor and Penetration guide, and anything else that we can use to find data on how much damage we are taking, what stat distributions will let us do the most damage, average mana usage, etc.) to determine exactly how we want our stats to be distributed in the end-game of an average match, the end-game against an energy-damage-based team, the end-game against a physical-damage-based team, the end-game of a match we are losing, and as many other scenarios as we can possibly describe and cover in a 40 card deck.
Firstly, ignore any situations where you are winning by a large margin due to difference in skill. Ideally, you want all your decks to be built for handling worst case scenarios. There is no reason to build decks that only work if you're winning. Putting all your points into Physical Damage and nothing into ![]() Health might make you three-shot noobs who don't know how to farm, but that approach won't work against an evenly matched or better team. In trading card games we would call cards that help you do this win-more cards. They don't help you come back from a losing position, all they let you do is win more when you're already winning. A win-more deck will let you win easy games more quickly - but it won't let you win hard games. You should always be playing as if you're trying to outsmart an intelligent enemy, even if you're playing against a brick on a keyboard. And that includes bringing your own wards, even if you're a carry :)
Health might make you three-shot noobs who don't know how to farm, but that approach won't work against an evenly matched or better team. In trading card games we would call cards that help you do this win-more cards. They don't help you come back from a losing position, all they let you do is win more when you're already winning. A win-more deck will let you win easy games more quickly - but it won't let you win hard games. You should always be playing as if you're trying to outsmart an intelligent enemy, even if you're playing against a brick on a keyboard. And that includes bringing your own wards, even if you're a carry :)
Next, we will look at how many of these scenarios can be identified before a match even begins. Most of the time you will know if you need more Physical Armor or Energy Armor before the round begins. Splitting your deck into two separate decks based on such predictions can save you a lot of clutter and allow to spend more of your 40 card limit on flex items for other ways the match can develop. The obvious downside to this is that it will quickly cap out your deck limit in Paragon but, as as I've said in the first paragraph, building pro decks isn't easy and you might have to spend some reputation or coins on extra deck slots.
After finding our optimal builds for each scenario and separating the deck by scenarios which we can see developing before locking in a deck, we will take the optimal builds for each scenario that one deck will cover and figure out the differences between them. For this I like to use the average match's optimal stat distribution as a baseline. We will compare each situational stat distribution to that of the average match and figure out exactly how much more of a specific stat we need for specific scenarios. For example, I might find that I want to use 2 less Power on Physical Damage and 1 less Power on ![]() Attack Speed and use them to purchase Physical Armor or Energy Armor instead when playing against teams with an asymmetrical damage type distribution as a specific hero. I might also find that I would have the most optimal stat distribution during losing matches when I move some points from Energy Damage and Cooldown Reduction to
Attack Speed and use them to purchase Physical Armor or Energy Armor instead when playing against teams with an asymmetrical damage type distribution as a specific hero. I might also find that I would have the most optimal stat distribution during losing matches when I move some points from Energy Damage and Cooldown Reduction to ![]() Health as it allows me to be a presence in fights longer, be more capable of escaping losing fights (which, when the respawn times reach 100 seconds and your inhibitors and core are being attacked, can be the difference between winning and losing), and allowing me to use all my skills before dying. Now, we will take the stat I am trading away the most of and the stat I build situationally and then we will find an item that can be built for both of these stats. We will do this for each scenario to pick out our flex items, and we will try to fit as many of these in the build as possible (prioritizing most common scenarios first). The goal is to come up with a build that is optimized for an average game (ideally a losing game, since that's when we need every little advantage as much as possible) that will have flex items for almost every scenario and that will still be close to optimized even after we flex an item towards a situational stat. The last thing you want is to use a Tempered Plate for physical armor, only to realize you'd rather trade away some
Health as it allows me to be a presence in fights longer, be more capable of escaping losing fights (which, when the respawn times reach 100 seconds and your inhibitors and core are being attacked, can be the difference between winning and losing), and allowing me to use all my skills before dying. Now, we will take the stat I am trading away the most of and the stat I build situationally and then we will find an item that can be built for both of these stats. We will do this for each scenario to pick out our flex items, and we will try to fit as many of these in the build as possible (prioritizing most common scenarios first). The goal is to come up with a build that is optimized for an average game (ideally a losing game, since that's when we need every little advantage as much as possible) that will have flex items for almost every scenario and that will still be close to optimized even after we flex an item towards a situational stat. The last thing you want is to use a Tempered Plate for physical armor, only to realize you'd rather trade away some ![]() Attack Speed instead of
Attack Speed instead of ![]() Health and now you become an easier target than you were before because Tempered Plate was your main source of
Health and now you become an easier target than you were before because Tempered Plate was your main source of ![]() Health until you traded it away. This is also brings us to my next point: you should avoid using flex items that can only be flexed at the cost of stats you wish to hold on to, but if you have to then there are ways of making it work. My favorite way is a flex system.
Health until you traded it away. This is also brings us to my next point: you should avoid using flex items that can only be flexed at the cost of stats you wish to hold on to, but if you have to then there are ways of making it work. My favorite way is a flex system.
A flex system is two (or more, but hopefully only two) items that allow you to flex for a stat without having a single item that allows you to do so. Let's say you are trying to flex for Energy Armor but you're playing Grux, Iggy'n'Scorch, or Twinblast and the only card you have access to that has Energy Armor is Tuned Barrier. Your build has a very particular stat distribution and you want a specific amount of ![]() Health upgrades, but the only way you can build for Energy Armor is by giving up
Health upgrades, but the only way you can build for Energy Armor is by giving up ![]() Health. The solution is to use an Adamant Edge or a Staff of Adamant with both Physical Damage / Energy Damage and
Health. The solution is to use an Adamant Edge or a Staff of Adamant with both Physical Damage / Energy Damage and ![]() Health upgrades, and then using this to adjust how much
Health upgrades, and then using this to adjust how much ![]() Health you will have in your final build. I usually build the flex item first and the balancing item next, but upgrading them evenly also has its merits.
Health you will have in your final build. I usually build the flex item first and the balancing item next, but upgrading them evenly also has its merits.
Now that we figured out what our final build stats will be and how we will go about flexing for each stat we need, we are going to be tackling the issue of our core items. In advanced builds, core items are generally split into two categories: rush core items and final core items. Rush core items are items we rush to complete early using cheap upgrades, much like the first items in my standard builds. These items are generally going to cost 6 Power (3+1+1+1), to stay in line with the way that Paragon awards Power 3 points at a time, and are built from cards that cost 3 Power or less and can be upgraded with three minor upgrades. We rush these for the same reason we rush the early items in a standard deck - to gain an advantage. These items are built in such a way as to prioritize the stats that are most helpful early on - we wouldn't build stats such as Cooldown Reduction before our ![]() Mana increases, and we wouldn't build excessive Physical Penetration or Energy Penetration before the enemy even has anything more than their hero's natural armor. Later, we will be selling these items and replacing them with the more costly ones from our final build, doing our best to match up the rush items and the final items replacing them based on which stats they boost. You don't want to sell your rushed
Mana increases, and we wouldn't build excessive Physical Penetration or Energy Penetration before the enemy even has anything more than their hero's natural armor. Later, we will be selling these items and replacing them with the more costly ones from our final build, doing our best to match up the rush items and the final items replacing them based on which stats they boost. You don't want to sell your rushed ![]() Health item to make room for a pure Energy Damage item, if you have no other source of
Health item to make room for a pure Energy Damage item, if you have no other source of ![]() Health yet. However, for some builds such as Crit builds, you would ideally want to rush Physical Damage items and then sell them to make space for late game
Health yet. However, for some builds such as Crit builds, you would ideally want to rush Physical Damage items and then sell them to make space for late game ![]() Crit Chance, as building
Crit Chance, as building ![]() Crit Chance early isn't as effective as building Physical Damage. A 6 Power item can generally be replaced once you have 3 unspent Power before selling the item. A 6 Power item will, in most cases, give 7 Power's worth of stats, which means that an item worth 3 Power with 6 Power spent on upgrades would have to offer no bonuses until it is fully upgraded in order for such a replacement to be a downgrade. Because every 3 Power item in the game offers at least 1 Power's worth of stats before being upgraded, such a replacement will never be a downgrade as long as you have at least 3 unspent power before selling the item being replaced.
Crit Chance early isn't as effective as building Physical Damage. A 6 Power item can generally be replaced once you have 3 unspent Power before selling the item. A 6 Power item will, in most cases, give 7 Power's worth of stats, which means that an item worth 3 Power with 6 Power spent on upgrades would have to offer no bonuses until it is fully upgraded in order for such a replacement to be a downgrade. Because every 3 Power item in the game offers at least 1 Power's worth of stats before being upgraded, such a replacement will never be a downgrade as long as you have at least 3 unspent power before selling the item being replaced.
Picking final core items is fairly straighforward. We go through a similar process as above, figuring out which unique effects we wish to add and such, and then reference the stat distribution we came up with before to figure out what items and upgrades to pick in order to reach our potential distribution once we hit 60 Power. We want to stay mindful of what order we wish to buy these items as some stats are more helpful during the earlier parts of the game than others, although this time we are dealing with the mid-game and not the early-game (as was the case with the rush items) so our priorities will be different. Do not make the wrongful assumption that you have to replace your oldest rush item first, and then follow through in the order your rush items were first bought. Also try and stay mindful of what your optimal damage stat distribution is at these levels and try to follow it as closely as possible. If you purchase all your ![]() Attack Speed first and then purchase all of your Physical Damage, you will probably not be doing as much damage in the mid-game as you could be if you bought
Attack Speed first and then purchase all of your Physical Damage, you will probably not be doing as much damage in the mid-game as you could be if you bought ![]() Attack Speed and Physical Damage in an optimal ratio.
Attack Speed and Physical Damage in an optimal ratio.
My rush builds usually consist of three 1 Power items, followed by three 6 Power (3+1+1+1) rush items, followed by replacing each 1 Power item once I earn 6 more Power netting a total 7 for the next three rush items. Once my build reaches 6/6/6/7/7/7 I proceed to start replacing the rush items any time I earn 3 points. However, I prefer to hold on to two 6-Power rush items whenever possible to save on cards and hassle, but this depends on the hero. Because of this, I ideally aim for 6/6/9/13/13/13 but that is rarely possible due to the availability of upgrades of specific costs for some stats (such as Strikes and Casts) and viable 4+ Power items. Instead, I will sometimes sell more than one of my 1 Power items at once to distribute my Power differently or otherwise modify the progression to nicely flow into the final build.
Notes on Specific Items
Items such as Circlet of Health and other items which grant ![]() Health Regeneration or
Health Regeneration or ![]() Mana Regeneneration are most effective in the early game. As the amounts of health and damage being dealt scale up, the return on regen diminishes. This is why your Health Potion and Mana Potion feel like they get weaker as the game progresses.
Mana Regeneneration are most effective in the early game. As the amounts of health and damage being dealt scale up, the return on regen diminishes. This is why your Health Potion and Mana Potion feel like they get weaker as the game progresses. ![]() Health Regeneration is almost never significant enough to make a difference in your survivability during fights - all it does is help you sustain in lanes, which isn't as useful once sustaining in experience range of dying creeps gets easier with your increased
Health Regeneration is almost never significant enough to make a difference in your survivability during fights - all it does is help you sustain in lanes, which isn't as useful once sustaining in experience range of dying creeps gets easier with your increased ![]() Health and damage relative to creeps. If you choose to build it, please understand that you are sacrificing all other stats that could be bought for the Power you're spending on
Health and damage relative to creeps. If you choose to build it, please understand that you are sacrificing all other stats that could be bought for the Power you're spending on ![]() Health Regeneration. However, building cheap
Health Regeneration. However, building cheap ![]() Health Regeneration items and selling them to make room for late game items is certainly a viable strategy. I find that
Health Regeneration items and selling them to make room for late game items is certainly a viable strategy. I find that ![]() Lifesteal often helps with survivability in fights much more than
Lifesteal often helps with survivability in fights much more than ![]() Health Regeneration, especially since it scales with the damage you deal.
Health Regeneration, especially since it scales with the damage you deal.
A Shaman's Drink provides 203.4 Mana at level 15 before having to be refilled, which means you'd need 2.7 Power dedicated to ![]() Mana upgrades to bring this much
Mana upgrades to bring this much ![]() Mana with you out of your base. However, it cannot take upgrades, it is only available to
Mana with you out of your base. However, it cannot take upgrades, it is only available to ![]() Growth heroes, and it should only be bought at or after level 6. Every Growth hero should replace their Health Potions and Mana Potions with Hunter's Drinks and Shaman's Drinks by level 6, even if you will be selling them later. You should never make the mistake of thinking a Shaman's Drink is of equal utility to a Hunter's Drink. Your
Growth heroes, and it should only be bought at or after level 6. Every Growth hero should replace their Health Potions and Mana Potions with Hunter's Drinks and Shaman's Drinks by level 6, even if you will be selling them later. You should never make the mistake of thinking a Shaman's Drink is of equal utility to a Hunter's Drink. Your ![]() Mana can only be drained as quickly as your Cooldown speeds allow and (in some matchups) can be hurt by an opponent's abilities, but not nearly as quickly as your
Mana can only be drained as quickly as your Cooldown speeds allow and (in some matchups) can be hurt by an opponent's abilities, but not nearly as quickly as your ![]() Health can be depleted when the enemy team focuses on you. Therefore, the regeneration from a Shaman's Drink is going to be significant by the time you would've run out of
Health can be depleted when the enemy team focuses on you. Therefore, the regeneration from a Shaman's Drink is going to be significant by the time you would've run out of ![]() Mana. However, your
Mana. However, your ![]() Health can get burst down in a second, meaning you can't equate the
Health can get burst down in a second, meaning you can't equate the ![]() Health Regeneration from a Hunter's Drink to max
Health Regeneration from a Hunter's Drink to max ![]() Health as you might simply lack the time to regenerate in scenarios when you need more max
Health as you might simply lack the time to regenerate in scenarios when you need more max ![]() Health the most.
Health the most.
Every hero has some natural Physical Armor and Energy Armor. As a carry, you should always be building at least enough Physical Penetration or Energy Penetration to counteract this armor as it will be present in 100% of your enemies (even without armor items) and your enemy will, in all likelihood, be building Physical Armor or Energy Armor against you as well so be prepared to further expand that Physical Penetration or Energy Penetration. To figure out exactly how much Physical Penetration or Energy Penetration you need, I strongly suggest you use George's Armor and Penetration guide.
(The following is being re-evaluated, so do not view it as absolute truth) In my calculations, Crit never reach as much damage as ![]() Attack Speed builds. Even with dedicating three of your power to the unique passive that boosts your crit damage from 150% to 200%, the potential simply isn't there. As far as I am aware, abilities cannot score Crits - if this changes, then Crit builds will become much more viable. Learn to view
Attack Speed builds. Even with dedicating three of your power to the unique passive that boosts your crit damage from 150% to 200%, the potential simply isn't there. As far as I am aware, abilities cannot score Crits - if this changes, then Crit builds will become much more viable. Learn to view ![]() Crit Chance as a dead stat and build other damage-boosting stats in its place.
Crit Chance as a dead stat and build other damage-boosting stats in its place.
PS If I was wrong here, please let me know and provide mathematical evidence. I will amend this section and give you credit, or link it to your guide if you have written one on the topic. George has warned me of the dangers of oversimplifying DPS calculation and I could've made mistakes. In fact, I never accounted for how armor factors into this... I will come back to this later, but if someone could do the math for me I'd greatly appreciate it :)
Harvester Keys drop off in value as a round progresses. Harvester Keys provide their value through Harvesters. By buying a Key early and putting up Harvesters that will continue to give you Amber for the rest of the match, you can get maximum value out of a Key. However, once you already put up the Harvesters in your jungle and now the Key isn't being used or it is only being used to compete for the side-lane and Orb Prime Harvesters (which, since they get destroyed constantly, provide less value) isn't worth as much. Because 3-Power Keys are generally built later into the game, where this is the scenario, they suffer from four problems which cause them to depreciate in value. Firstly, the longer a round goes on, the less time is left before the round is over. Therefore, the less potential Amber each Harvester can still give you. Second, they allow you to carry two Key charges when you will most likely not even be using a single one because your team already has your jungle warded and your camps farmed by your Jungler, removing most incentive for the enemy to be there and waste valuable time. Third, when your team is already hitting 60 Power, there is no more benefit to Harvesters and the Keys as you are no longer earning any more Power. And, lastly, as the game progresses Harvesters become more and more prone to destruction as the DPS of all heroes increases, thus becoming less reliable as a source of Amber. Almost no one is going to waste their time trying to destroy Harvesters when they can't do it quickly, but they will be much more likely to do so later on when it becomes much easier. A Harvester's Key is an amazing item. A Brawler's Key and other such keys are worth their value in the early-game and start losing value towards the mid-game, but quickly depreciate around the point you realize you aren't using the charges on them anymore. I find that I usually only use 1 charge off of 3-Power Keys before returning to the base so usually I would prefer to purchase a Harvester's Key and hold onto it for as long as possible, only replacing it once I get to the 6th (or, sometimes, 5th) item in my final build. And, remember, deciding to sell your Key and then realizing you still need to put up a Harvester is only going to cost you 27 seconds. If you're smart, you can fit in those 27 seconds at a point where your team can spare you to go and capture a Harvester.
Deck-Builder Tips
When building your deck, be mindful of the order in which you add duplicates of the same card. After they have 3 upgrades assigned to them, they will be reordered to separate them from the items that do not have at least 3 upgrades assigned. Then, every time you edit one of these items they will be moved to the bottom of the duplicates in the list. However, this does not reflect the order they will appear in your inventory when playing. A good trick to bring the cards back to the original order is to close out of the Deck Editor and re-open it.
(The following is being rewritten. I realized that this only applied to some of my decks so it is at best partially true, and even I struggle to understand the card order mechanics entirely) For some reason, the bottommost copies (in standard order, before shuffling due to editing) appear leftmost in your inventory when playing. Thus, if you have two copies of the same item but one has cheaper upgrades, the cheaper version should always be below the more expensive version. There is no good way to change the order of these cards so simply move all the upgrades from one to the other. All other cards are ordered alphabetically. You can also see what upgrades are on a card by mousing over it and seeing the numbers and icons displayed below it when in the shop menu in a match.
Post-Scriptum Notes
In the following paragraphs I will add new thoughts I've had since writing this guide if I can't fit them anywhere else.
FAQ
As questions get asked in the comments, I will answer them here.
-
Q: I don't have any Minor upgrade cards. What should I do to get as much bonus CP from upgrades?
A: The best way to deal with this is to buy tokens to cover the stats you wish to gain, and then sell them to buy the items and 2-Power upgrade cards to finish out your full upgrade bonuses. This question actually inspired me to add a Tokens section to my guide, so check above to see how I suggest they are utilized. I am going to assume that right now we are dealing with not quite the worst case scenario but a rather common one, where your first item is going to cost you 3 Power and you will be stacking it with three 2-Power upgrades, netting a total cost of 9 Power. The absolute best thing to do is to first check how much Power's worth of stats the item provides without upgrades. An item like Windcarver Blade provides 2 Power's worth of stats while Impact Hammer provides 3 Power's worth of stats without upgrades, and both cost 3 Power. If my first item was an item that has 2 Power's worth of stats prior to upgrades and would cost a total of 9 Power to buy and fully upgrade, I would probably first buy 3 tokens, then the item, and then upon powering up one more time I would sell the three tokens and buy three 2-Power upgrades for my newly gained 3 Power and the 3 reclaimed Power from the tokens. If my first item was an item that has 3 Power's worth of stats prior to upgrades and would cost a total of 9 Power to buy and fully upgrade, I would probably first buy the item and then, if I had to make a trip to the base after only earning 3 more Power, I would buy the 3 tokens. If I had gained 6 Power before my next trip to the base, I would skip the tokens and fully upgrade the item. If you do not have minor upgrades or tokens, the next best thing to do is to try and make sure your early items are high-return items which provide 3 Power's worth of stats for 3 Power without needing any upgrades. If this is not possible, you will have to bite the bullet and simply build your 9-Power item as is. If you have even a single relevant minor upgrade, I strong recommend using it for this item. It will allow you to upgrade the item with a 1, 2, and 3-Power upgrade as opposed to three 2-Power upgrades, meaning that it will divide evenly into 3's and you will not have 1 unused Power half way through upgrading it. With a 3+2+2+2 build, your first 3 Power goes towards buying the item, your next 3 goes into buying one upgrade (with 1 unused Power) and your next 3 goes into buying the last 2 upgrades. This is not the case with a 3+1+2+3 upgrade plan. -
Q:
A:
Parting Words
Thank you very much for reading! I hope this helps you with building your decks. If you have found anything wrong with my guide, please let me know. If I have gotten any math wrong or I have used incorrect data to base some of my claims and decisions, please provide me with evidence for why I was wrong so I can correct my mistakes. I will give you credit for noticing my mistakes and link to your guide on the topic, if you've written one.
Suggestions for Further Reading
Check out A Beginner's Guide to Deck Building and Advanced Deck Building by PsYcHo962. PsYcHo962's guides inspired me to write my own, and a lot of the more basic stuff I covered here is covered in those guides as well. While we might disagree about the relative magnitudes of the advantages and disadvantages of different deck-building approaches, I still respect PsYcHo962's work greatly and would recommend it for a second perspective as you learn to build great decks yourself!
George has published a lot of in-depth analysis pieces on many aspects of Paragon. I strongly suggest you check out his work as some of it became a basis for my understanding of the game and of deck-building.
Readers' Insights
Here I will post informative, knowledgeable, and otherwise useful observations made by the commentators, with credit to their authors. I feel that a lot of useful information gets lost in the discussion so bringing it to the forefront here might help it reach more people.
"...most MOBAs make you sell items at a loss, where in Paragon if you... discard... cards you functionally don't lose anything." -greatpower20, Reddit.
I just realized that I never explicitly mentioned the fact that Paragon has a 100% refund policy on Power! Thanks for bringing that up!
"Your deck should be built to handle the situations you expect, usually even situations, but some champions are literally built to get ahead like Howitzer or Iggy. In these decks building options that are designed to accelerate you when you're already ahead can be very powerful. Some characters are usually going to be even, and in those cases you should plan around being even, and have options if you're behind, but right now a lot of that overlaps." -greatpower20, Reddit.
You're absolutely right, although I do not think building for a tough/losing match and building for opportunities to get ahead are mutually exclusive. In such cases, I think it is most important to have options in your deck for bouncing back from the enemy shutting down your momentum.


@rad619619, I like this. Pretty detailed and it really worth spending time on reading all of this.
A couple of notes
And here is a question for your FAQ section.
- your first item should cost you any more than 6 Power when it is fully upgraded is failing you
but I don't have any Minor upgrade cards. What should I do to get as much bonus CP from upgrades?
Thanks for the pointers! I was not aware of the shortcomings of DPS calculation. I should've added that I did not solely use the DPS given by the meter, but used it as a baseline for pure left-clicking damage per second, scaled by what I felt was my average amount of time spent left-clicking per engagement, and factored into it the impact of each skill on a typical gank attempt during the mid-to-late game with each skill maxed and assuming my ult is up on 2/5 of engagements (felt that half was too frequent but a third not frequent enough). Still, I felt that I shouldn't elaborate since it is not too relevant to my guide - I only really mentioned the Deck Builder to help newer players find additional resources for building their decks.
I will edit the headings shortly and look for places where using the block quotes as highlights would be appropriate.
Thank you again for the criticism! It will help me with my future guides too.
Hey, block quotes seem to displace entire paragraphs so there is no easy way to add them in without breaking up the flow of the sentences or distracting the reader with frequent skips in spacing. I hope it is alright if I use italics, bold letters, underlines, and highlights to draw attention instead? Let me know if it is not and I will edit this further.
@rad619619, you are correct. White color works good as well.
PS
I like the image :)
Thanks a lot George!
Oh, by the way, what do you think it would take to get this guide featured? I hope you don't mind me asking, but I'd love to develop it to meet your quality expectations and have it read by as many players as possible. It is the best way for my hard work to help as many people as possible.
@rad619619, it is done.
And if you want to cover as many people as possible you might be willing to share a link to here on official community resources like Reddit and Paragon Forum.
That's an awesome suggestion! I just finished doing that. Thank you so much for featuring my guide!